
1) painted the walls
2) bought/framed art work
3) hung curtains (though, to be fair, I did that for our 3 rooms with big windows)
4) assembled my nursing chair
5) got a new lamp shade
6) re-built the crib we bought
7) built the shelving unit (being honest, I didn't do that one...Seb did.)
Still. My other rooms have had a bit of art hung in them, and I did get new handles and drawer pulls on the kitchen dresser, and I refinished the chest that looked like a victim of domestic abuse to show it some love (and make more seating). That said, through all of these projects there was one room that was sadly lacking in TLC: our bedroom.
Yeah, I'd hung some pretty awesome sage green curtains, but aside from a few token efforts to keep the space tidy (which were appallingly "meh" as efforts go), I really hadn't done anything to make our room nicer. Which is a shame, because especially once the baby comes, I want this room to feel nice. I want it to be a bit of a sanctuary: a good place to relax. I'm not talking about going all Nate Berkus or Thom Felicia on it and adding a stripey accent wall and a crazy canopy over the bed with dimmer-switch-controlled sconces in brushed nickel or oil-rubbed bronze finish (an obsession I'd love to steal from YHL...) and tons of snazzy (and expensive) throw pillows to dominate half of the length of the bed. Can I just say how much superfluous "decorative" pillows bother me? You just throw them on the floor at night and have to pick them all up again in the morning so it doesn't look like Hurricane Katrina hit your bedroom!
I digress...those sorts of grand schemes really aren't on my radar. Would I paint the walls? Sure, if I found a nice neutral shade that set off the curtains and the dark furniture nicely. Would I consider a tiny plush rug to cover what little floor space is exposed? Yeah - just for the pampering factor. Do I want to remedy the two depressingly blank (and badly repaired) walls by our bed? You betcha! But what the room really needed first was to be organized. Tiny spaces die a horrible death when they're taken over by clutter, and by that assessment, our bedroom was struggling on life support.
A while back I suggested one small step to get me going: a hook to hang the cluster of necklaces currently beating the hell out of our wardrobe door and to get my Forever 21 straw hat off the chest of drawers so I could dust things more conveniently. So last weekend, while we were out getting some electronics supplies for the Husband, I convinced him to nip round the corner and take me back to - you guessed it - B&Q to snag some more project supplies.

With my chosen hook in hand, I decided this afternoon to make good on my promise to start improving our room and drilled the holes for the rawl plugs that came as part of the hook's installation kit. As you can see: drilling through crappy drywall isn't a very clean and neat process. Oh, and when I say crappy drywall, I'm not kidding. I could see the wall bow against the pressure when Seb pressed on a fitting to make sure it was secure. I'm not sure I'm terribly reassured by that demonstration...
Anyway: holes drilled, the rawl plugs that came with the hook were hammered in.

So the Husband unpacked a bag of rawl plugs and screws we bought for a previous project and used those instead. Life savers. These didn't disappear into the wall, never to be seen again. They also actually held the screws that fit the hook mountings, so I wasn't left with an ugly finish. Yeah, my hat will obscure the hook most of the time, but that was no excuse.

There was one more problem, though. The screws we'd got in the hook installation kit were crap. Just a few turns with our power drill had threaded them both thoroughly. It was a miracle that we managed to drill/ply them out again to start over!

I hate to say it, but we sure did get what we paid for! Luckily, though, that previous £2 we spent on a huge bag of more rawl plugs than we can possibly use saved our butts on this and we were able to make it work. Witness: my tiny necklace hook - though not as swanky as the ones I hunted down on Etsy - is installed and ready for use...

It helped that there was already a hole in the wall that I was able to just drill wider to use as a guide for hanging this thing. Oh, and lurking in the corner of the mirror in that picture is the other improvement I made to our room: a lampshade I don't hate. And it matches our curtains! I have to admit, I had my heart set on something cream and sage toile, but for £5 at Sainsbury's, I'm really not complaining!
So I tidied up the dresser, broke out the Endust and gave the whole thing a good wipe-down. Then I consolidated some of the junk we'd been accumulating and put everything into its new-found place. We really do both try to fight our natural tendency to be untidy pack rats. Thankfully, college (and then grad school in a 2-bedroom flat with 4 other people!) mostly cured me of my cluttered ways. Though it'll be another long cycle before I bother organizing my drawers again...there's so much stuff I just don't bother folding.

So the above is a much better representation of what our room looks like now. I just need to hunt down some nifty art to hang over the bed and get some more frames for family pictures on the other wall and then I'll be set. Er...I'll be set to start deciding what else I want to do to this room. I feel a long Etsy/Pinterest session coming up...
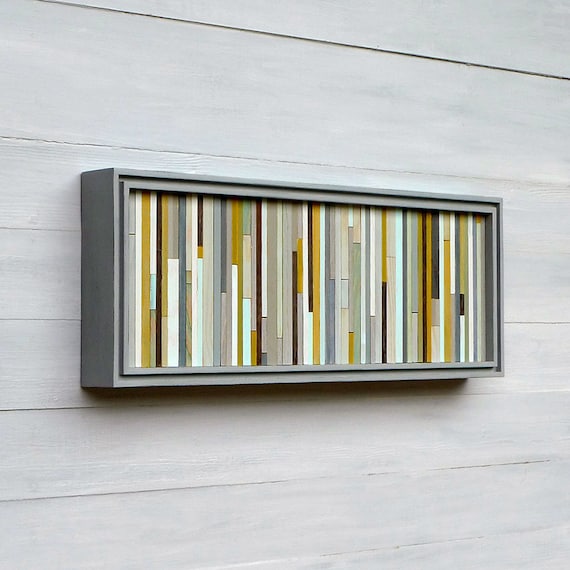
Something like this would be awesome hanging over the bed...
No comments:
Post a Comment